RAM API - Cracked
I finally cracked into the RAM Structural System API after maybe 3 years of wanting to get into it.

The key to getting in? More powerful googling.
Googling "RAM Structural API" yields some very uninspiring result. Usually the results pointed to the RAM Structural API documentation that looks very cryptic and appears to require C++ as coding language. A few snips from the API documentation.


All of this looked pretty intimidating and I had about 0 desire to learn a new programming language. I put learning the RAM API on the backburner even though this is our offices daily driver for most buildings.
Marcello Sgambelluri to the Rescue
One day I happened to stumble on a post on Autodesk's forum regarding RAM API access by Marcello. I knew Macello's name and I knew this would be the ticket to getting into the API. He always does a great job of documenting his madness.
A link to the material that cracked the API.
Following this link is kinda crazy. Never in my wildest dreams would I imagine that cracking the RAM API would involve some tech with Revit, Dynamo and C#... the whole RAM API documentation is in C++!! How, why? Seriously if you have an answer to how Marcello was able to access the API with C# and not C++, let me know, there is not a single mention of C# in the documentation. Maybe all .net languages can be intertwined??
Anyways, Marcello's examples utilize C# and something called zero touch nodes in dyanmo to unlock the RAM API. The examples are quite helpful and I can't wait to dig in deeper to see what the API might unlock.
I have posted the code on github. The hardest part was not the code, but setting up all the references in the visual studio IDE and getting the code to successfully compile. After some tweaking on the settings, I was able to get a successful build.
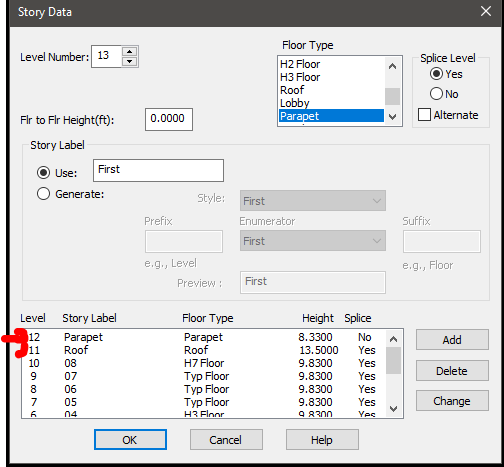
Upon loading the .dll (a .dll file is the compiled code as I understand it) into dynamo, you feed the file name into the "node" and the code returns the total number of stories in your RAM structural model. This is a simple example, but opens the doors to so much more.

The picture above correctly returns the number of stories in the sample RAM structural model I fed to it. HOW COOL IS THAT!
Moving forward, I hope to keep digging into the RAM API, exploring more of Marcello's examples and building some code of my own to automate tasks in RAM Structural.